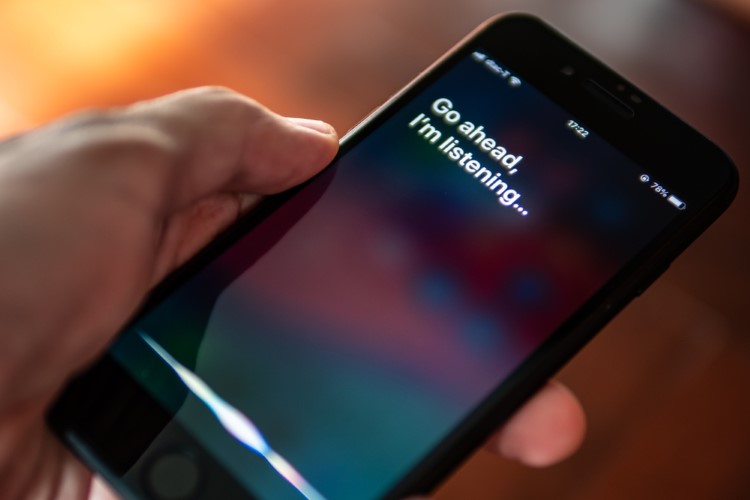
When the sensational reports about how Apple uses contractors to keep a tab on iDevice users’ conversations with Siri came out in the open, concerns about user-privacy got heightened. With the shocking revelation about Siri recordings being tapped and closely observed by humans, many Apple users are bound to lose their sleep. Thankfully, after the reports came out, Apple suspended the program. However, your old recordings are still saved on Apple’s servers. Well, if you put privacy and security at the top of everything else, follow along as I show you how you can delete Siri recordings from Apple’s servers right from your iOS and macOS device!
Tips to Delete Siri Recordings from Apple’s Servers
Before getting started with the quick steps, it would be better to clear out a few pivotal points.
A Bit More Spotlight on Controversial Siri Recordings
It’s extremely ironic that a company like Apple that never fails to lambaste other companies for being too data-hungry and represents itself as one and only savior of customer’s security and privacy can allow such a controversial program to run. In order to prevent the concerns from mounting, the Cupertino-based company has gone into the damage control mode and not only suspended its practice of using human contractors to grade snippets of Siri voice recordings but also offered a workaround to clean up the voice recordings.
But there is still a catch. You will need to completely turn off Siri and dictation on each of your devices to get rid of the voice recordings. This means you will not be able to use Siri if you decide to delete your recordings. This is a bad move from Apple and I wish that the company allows users to delete Siri recordings without having to turn off the voice assistant. That being said, let’s wipe out Siri voice recordings from your iPhone, iPad, and Mac!
Delete Siri Recordings from iPhone and iPad
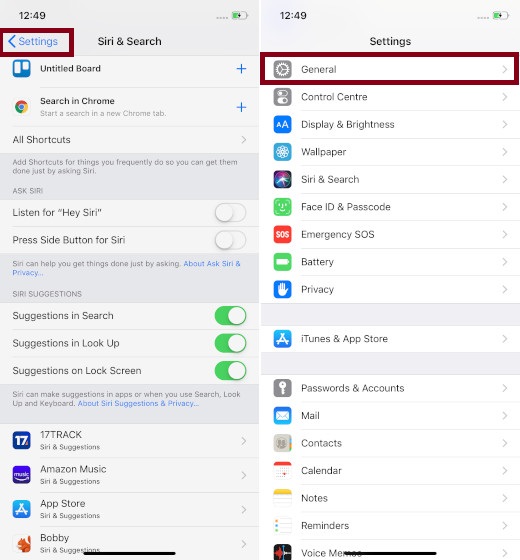
- Launch the Settings app on your iOS device.
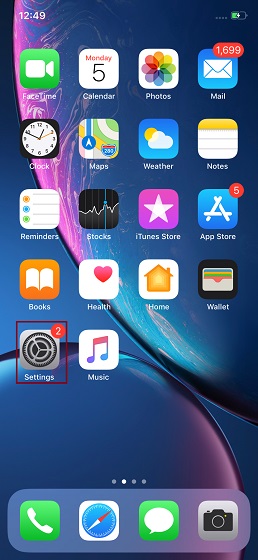
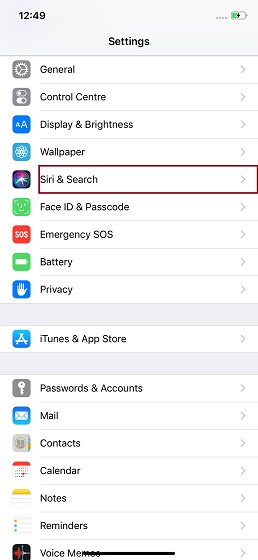
2. Now, tap Siri & Search.
3. Next, turn off the switch for Listen for “Hey Siri”. Also, make sure to turn off the toggle for Press Side/Home Button for Siri.
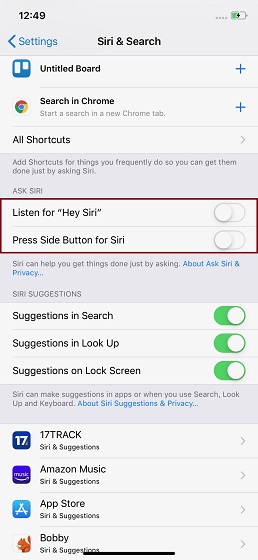
Now, you may see a warning from Apple that you’ve just turned off Siri. Ignore it.
4. Next up, tap the back button at the top left and choose General.
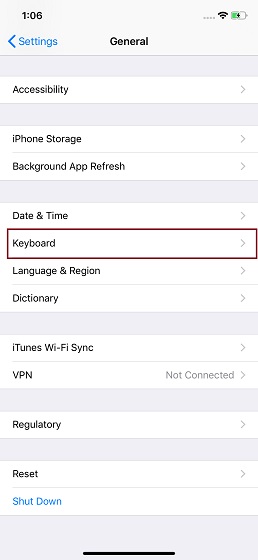
5. Up next, tap Keyboard.
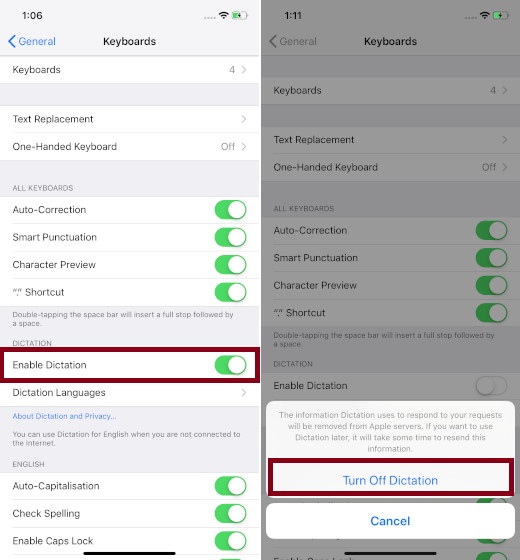
6. Finally, turn off the Enable Dictation toggle and confirm by tapping on Turn Off Dictation.
Clean Up Siri Recordings from Mac
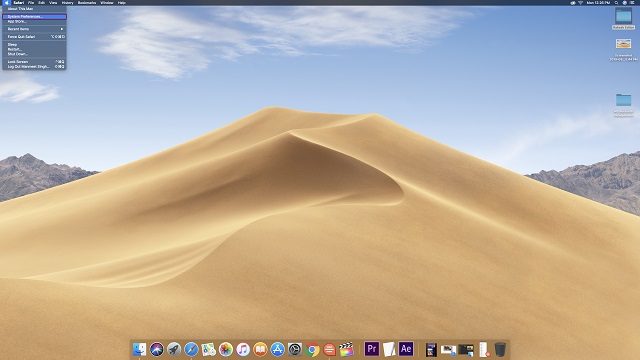
- First off, click on the Apple menu at the top left of the screen and select System Preferences. Alternately, you can also search System Preferences in the Spotlight and launch it when it appears.
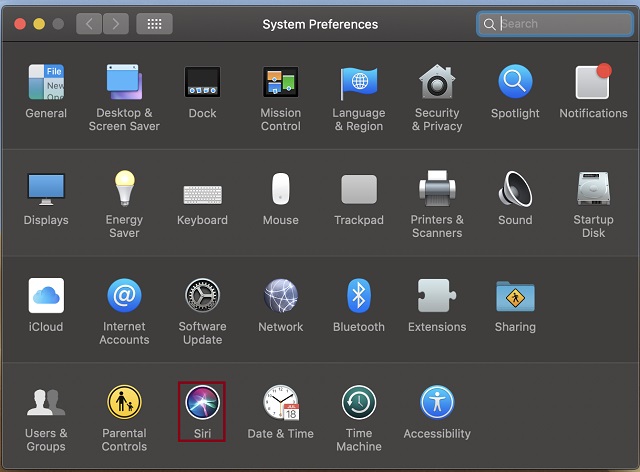
2. Now, click Siri.
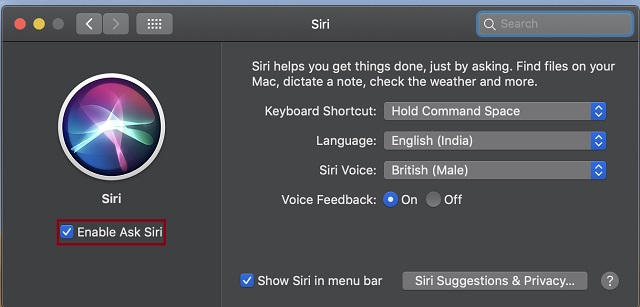
3. Next, uncheck the box to the left of Enable Ask Siri.
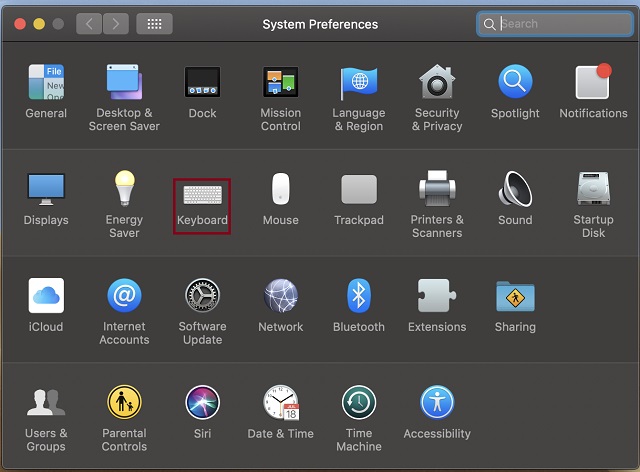
4. Next up, go back to System Preferences and click on Keyboard.
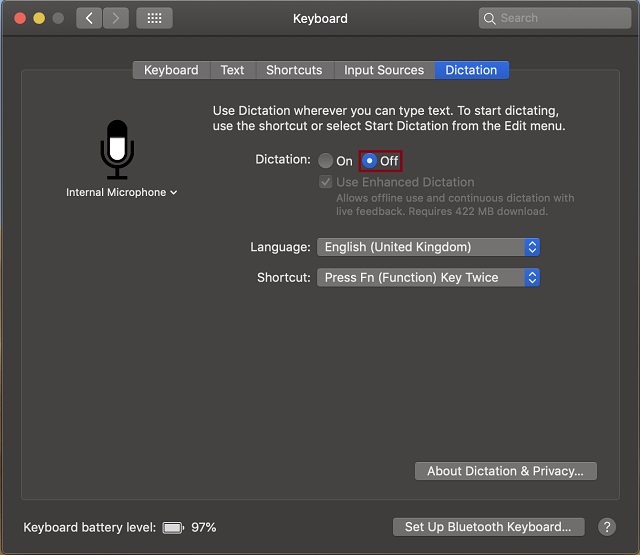
5. Up next, select the Dictation tab.
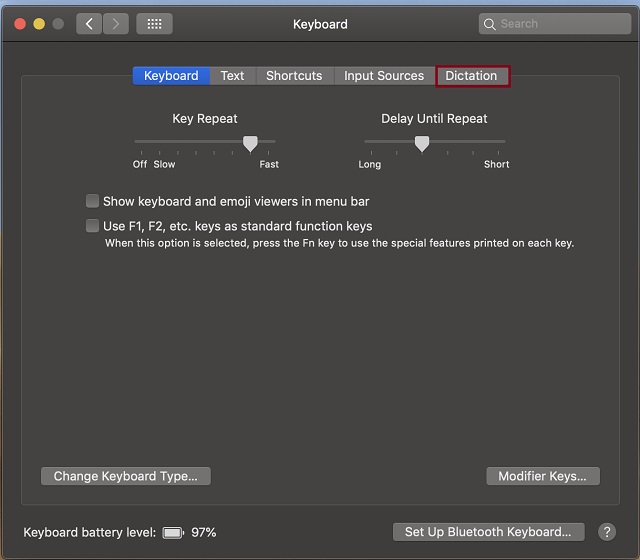
6. Finally, select the Off button to the right of the Dictation option to disable it.
That’s pretty much it!
Now, all of your Siri voice recordings will be wiped out from Apple’s server. And the tech giant will no longer keep its records. At any time, you want to go back to the normalcy, simply follow the same steps to turn on Siri and enable dictation on your device.
SEE ALSO: How to Connect PS4 Controller to iPhone
Clean Up Siri Voice Recordings from iOS and macOS Device
So, that’s how you can get rid of the Siri voice recordings right from your iOS and macOS device. As a user, I would appreciate if Apple offered a bit more straightforward way of deleting such data sooner than later. What’s your take on this sensational report and do you think that it will hurt Apple’s image. Feel free to share your valuable feedback in the comments down below.
from Beebom https://beebom.com/delete-siri-recordings-apple-servers/

No comments:
Post a Comment