Beyond the visual pleasure, there is a lot to like in the dark mode. For one, it not only safeguards your eyes against straining but also conserves plenty of power so that your device can last longer. While macOS has got the beloved dark theme for quite some time (since the days of macOS Mojave), it lacks an option to let users switch between dark and light mode quickly on Mac, unlike the iOS counterpart. Nevertheless, there is a hack that you can use to quickly switch between the modes. If you are willing to give it a try, here is a quick rundown to add a light/dark mode switch on your macOS device.
How to Add a Light/Dark Mode Switch on Mac
So, How Does This Trick Work?
Just in case you are wondering how this hack works, let me clear the doubts upfront. First things first, it requires Apple’s Automator app – a great tool for multiplying productivity on Mac. So, you don’t need to install any third-party software or shell out bucks to toggle the dark and light mode on macOS. Is there any hidden catch? Not at all. The only thing that you have to do is set it up perfectly by following a few steps. Once the setup is over, it works as expected – so long as you know how to double click on an icon!
1. Launch Automator app on your Mac. You can use Spotlight to quickly find it.

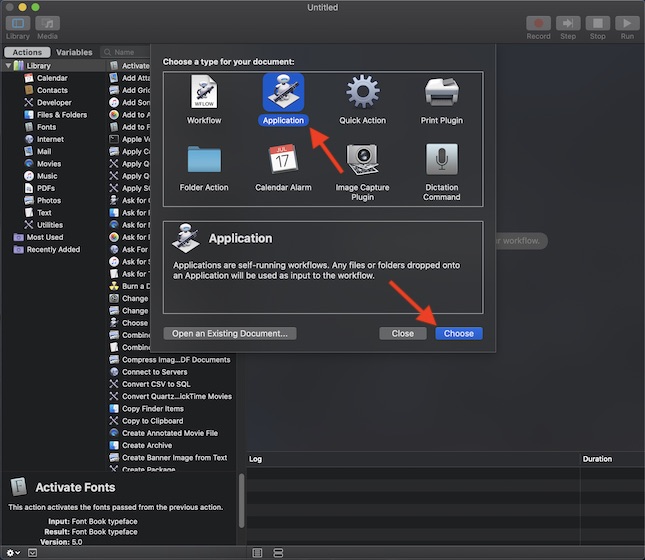
2. Now, select the Application option as a type to create a new document. Then, click on Choose.
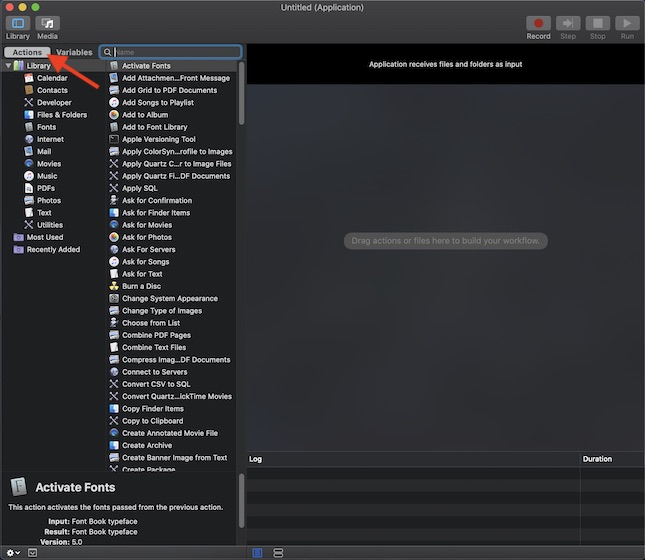
3. Next, choose the Library Actions section located in the sidebar.
4. Next up, search for “Change System Appearance”. When it shows up, drag it into the Automator workflow on the right.
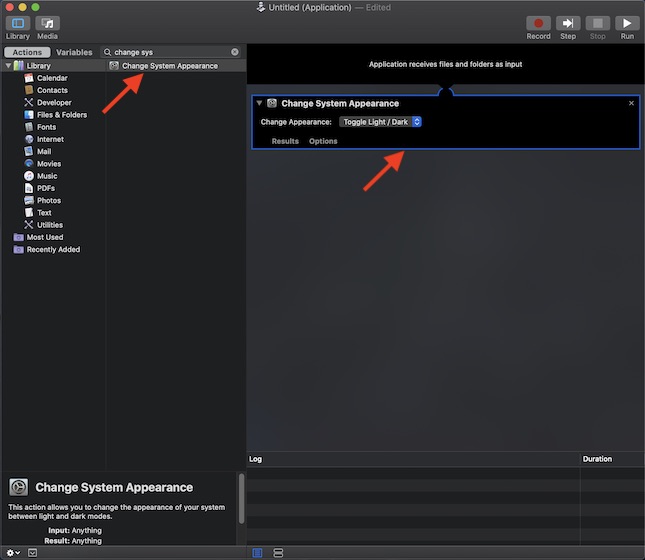
5. As you can see the “Change System Appearance” option is named “Toggle Light/Dark”. It’s time to save the Automator application as “Toggle Light/Dark.app” at your desired place like application folder, documents folder or even desktop.
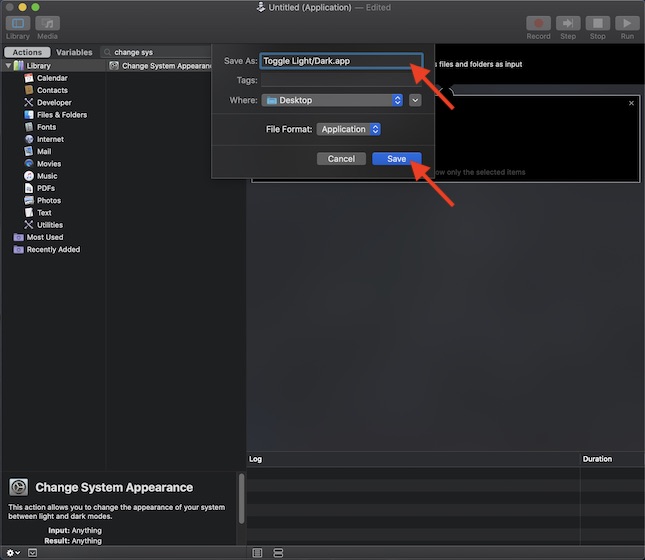
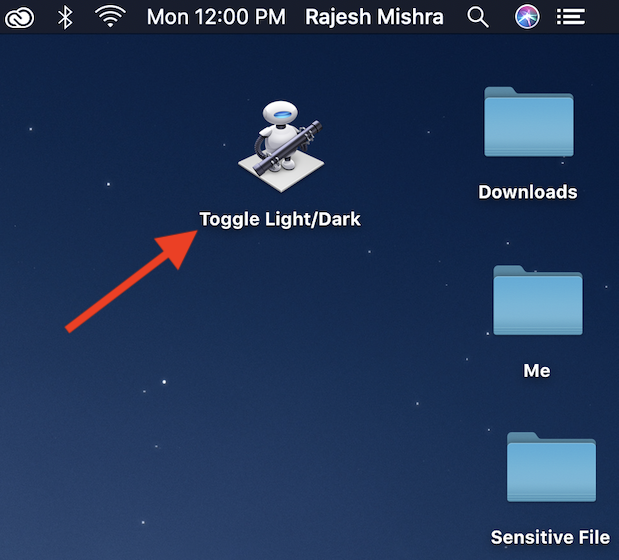
For a bit more convenience, I’m going to put the toggle on the desktop. When you are done, exit the app.
Switch Between Light and Dark Mode from Spotlight on Mac
Now that you have done the hard work, it’s time to reap the benefit. I mean, you can now change dark mode and light mode quickly. To do it, all you need to do is just double click on the Automator icon.

Note:
- The first time, you click on the Automator icon, a popup may appear asking for your permission. Click on OK.
- Just in case, you had saved the Toggle Light/Dark switch in documents folder or other places, you can use Spotlight to quickly find it and then hit enter to switch between the two given modes.
Toggle Between Light and Dark Mode with a Double Click on macOS
That’s the cool way to hop between the dark and light themes on macOS. As I said above, it works pretty well so getting through the hack shouldn’t be a big deal. Moreover, it feels like a native feature thanks to the neat implementation, isn’t it? If you have found it super handy, feel free to share your thoughts with us.
from Beebom https://beebom.com/how-quickly-switch-between-dark-light-mode-mac/

No comments:
Post a Comment