
Reverse image search is a great way to find information and verify the authenticity of images online. While we can easily reverse search images on desktops, it is a bit harder to reverse image search on phone due to Google’s limitation. Unlike the desktop version of Google Image, it doesn’t let you upload images from phones. This limitation gets on the nerve when you are in a hurry and have to reverse image search on phone quickly. That is why, we found some neat ways to get around the limitation to let you do a quick reverse image search right from your phone.
Reverse Image Search on Phone
There are quite a few ways to reverse search images on phones and we will list some of the best methods so that you can choose the one which feels comfortable to you. At first, we are using Google Image to identify the images and then we will hop on to other search engines. You can jump through the sections as you find convenient.
Reverse Image Search on Phone Using Google Images Desktop Site (Android and iOS)
In this section we are going to see how you can use Google images website to to do a reverse image search on your phone.
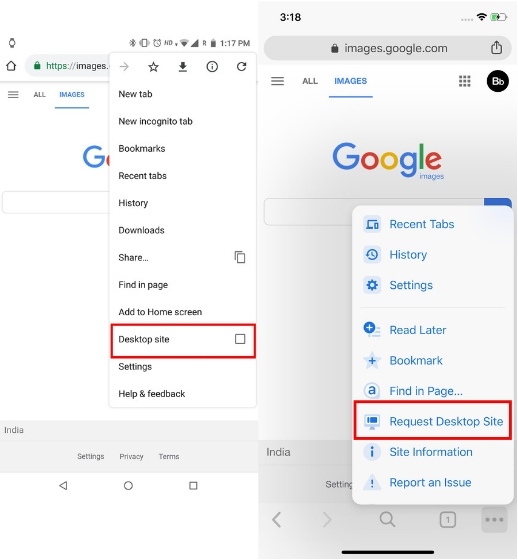
1. Open Google Images on Chrome and then tap on the 3-dot menu. Here, tap on “Desktop Site” and Chrome will reload the desktop site of Google Images.
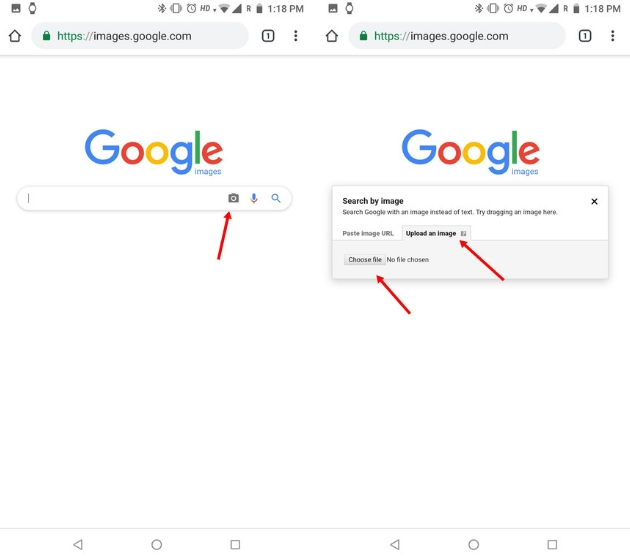
 2. After that, tap on the “camera” icon in the search box and switch to “Upload an image” tab. Now, tap on “Choose file”.
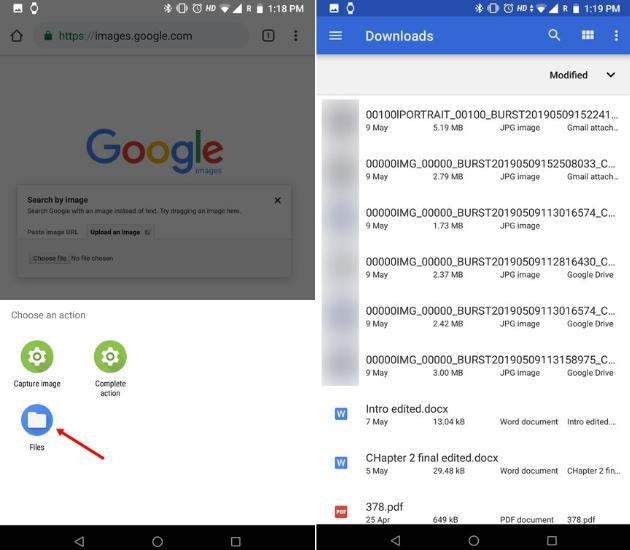
 3. Now, tap on “Files” to select the image that you want to find information about.
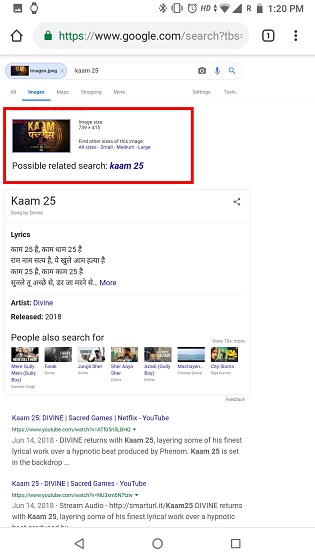
 4. It will start uploading the file and within seconds, Google will provide all the image details you are looking for.
Note: While we have used Chrome as an example here, you can use any browser that you want. The only thing you need to learn is to request for desktop site on the browser that you are using.
Reverse Image Search on Phone Using Third-party Services (Android and iOS)
If you find the desktop version of Google Images inconsistent with the mobile view, then you can use a simpler third-party sites and apps to reverse search the images. In this section, we are going to show you all the third-party reverse image search services and websites that you can use.
-
Reverse Image Search on Phone using Labnol (Android and iOS)
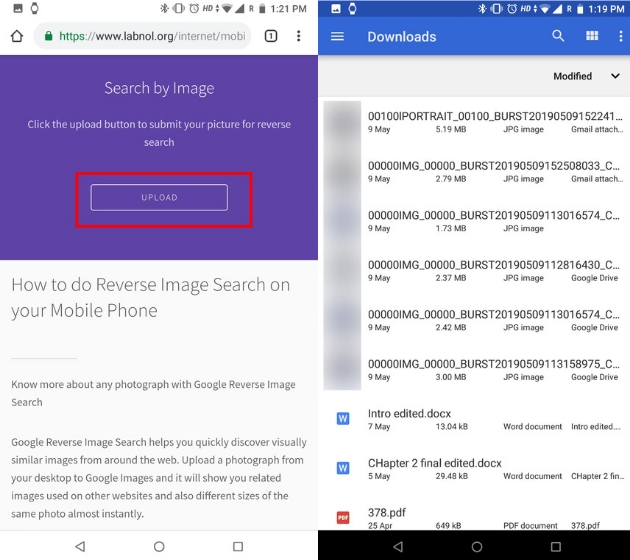
1. Open Labnol’s site on your mobile browser and tap on the “Upload” button. Here, select the image that you want to find the details about.
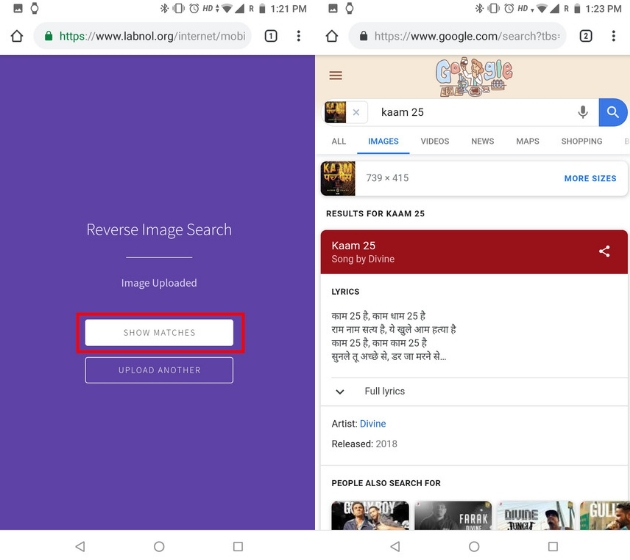
2. After uploading the image, tap on “Show Matches” button. The site will redirect to Google Images and here, you will find all the details about the uploaded image.
2. Reverse Image Search on Android Using Kiwi Browser
Kiwi browser has an inbuilt “Search by Google Image” option and it’s pretty helpful. It lets you know the image details without going through the hassle of downloading and uploading the image. If you regularly fact-check online images, this is the best way to do it.
1. Download Kiwi browser (free) from the Play Store and open it.
2. Open the website on which you want to verify the images. Tap and hold on an image and switch to the “Image” tab. Now, tap on “Search Google for this image”.
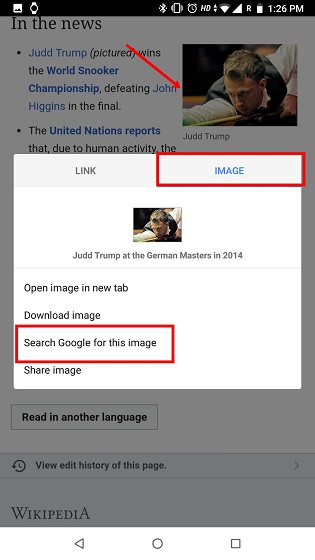 3. The browser will open Google Images with all the information about the image.

-
Reverse Image Search on iPhone and iPad Using Shortcuts
The Shortcuts (free) app is a fantastic tool to take automation to a whole new level. Here, we will use a custom Shortcut to reverse image search on iOS devices.
1. Open this shortcut and tap on the “Get Shortcut” button. It will open the Shortcuts app, here tap on the “Get Shortcut” button again. The shortcut will be added to your library.
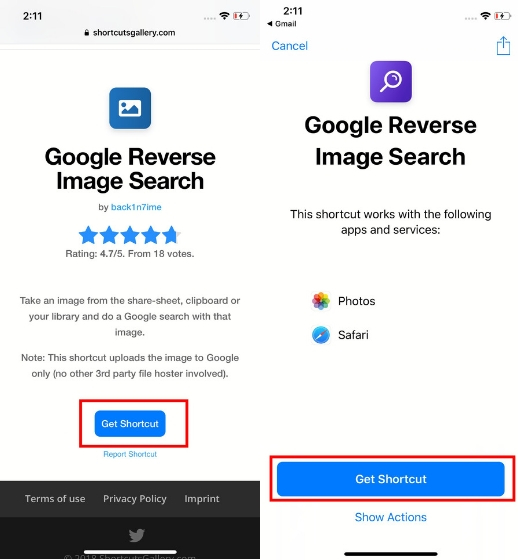 2. After that, run the downloaded Shortcut and select the image. It will upload the image and within seconds, the shortcut will redirect to Google Image. Here, Google will provide all the image information.
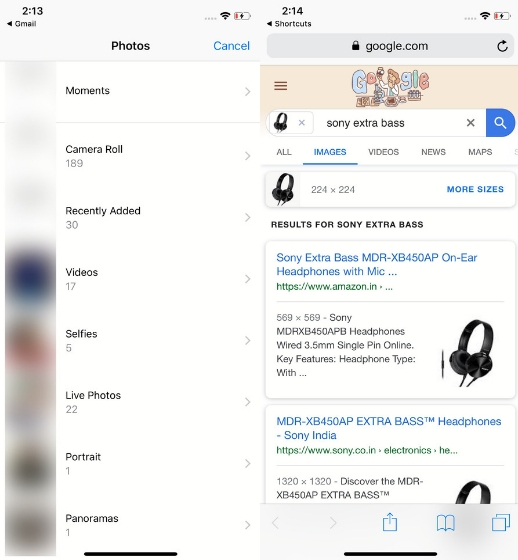 Note: The image must be in JPG, PNG or any Google compatible format. By default, Apple takes images in “High Efficiency” format. In case you are uploading images taken from your camera, you have to change the format to “Most Compatible” in Camera Settings.
-
Reverse Image Search on Phone with Bing Image (Android and iOS)
If you are not happy with Google’s image search results, you can use Bing and see if it can find information about your image. Bing has a mobile-based site which lets you upload images without enabling desktop site so that’s great. You can use this method both on Android and iOS.
1. Open Bing Image on your mobile browser and tap on the “camera” icon in the search box. Now, select the image that you want to find the details about.
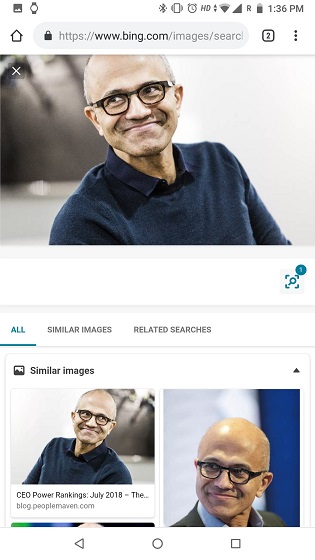
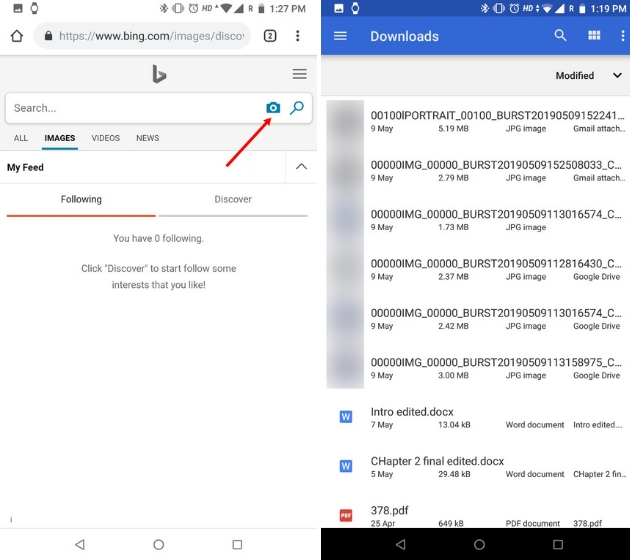 2. Here, Bing will provide image information and will show you similar images from the web.
-
Reverse Image Search on Phone with TinEye (iOS and Android)
Many believe TinEye is the best image search engine after Google. It uses computer vision, neural network and pattern recognition to find the source of the images. Also, you can use its website right from your mobile without any hassle.
1. Open TinEye on any mobile browser and tap on the “upload” button. After that, tap on “Files” and select the image for which you want information.
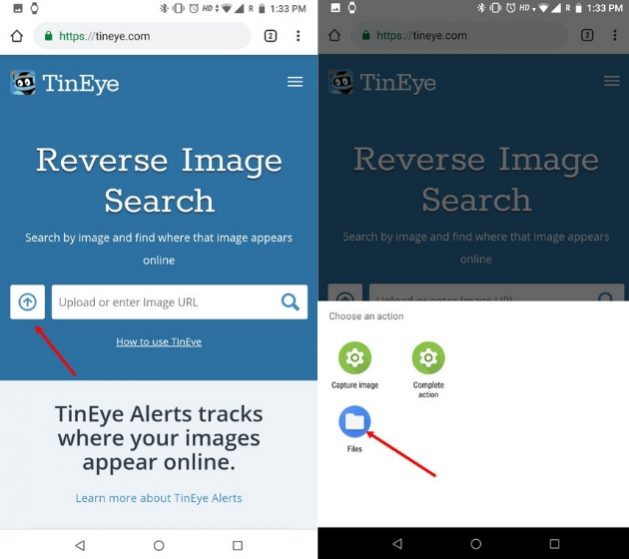
2. It will start uploading the image and within a few seconds, you will have the source as well as the upload date.

5. Find Image Information Using Google Lens in Photos
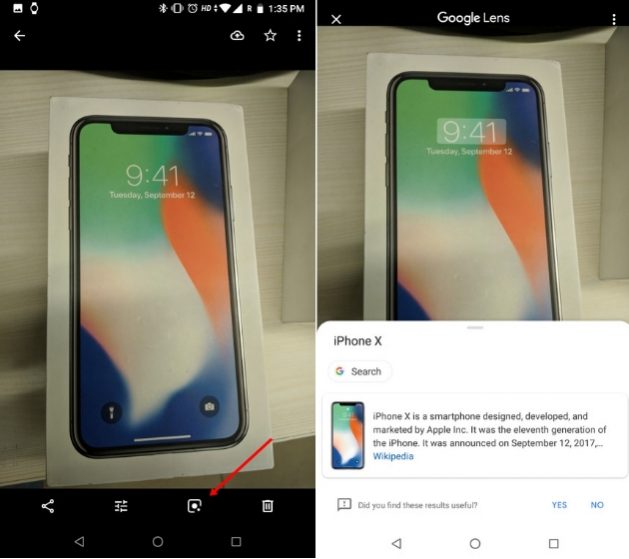
While Google Lens is not exactly a reverse search image tool, you can surely use it to find various information about images. For example, you can find the location of a certain building, name of different species of flowers, discover books from incomplete texts, etc. Also, Google Lens is available both on Android and iOS so that’s a plus point.
1. If you don’t have Google Photos on your device, then download it on your Android (free) or iOS (free) device.
2. Open the image using Google Photos and you will find the “Google Lens” icon at the bottom. Tap on it and Google Lens will find all information about the image.
SEE ALSO: How to Delete Google Search History (2019)
Reverse Image Search on Phone with These Tools
So that’s how you can find the information of images with source, upload date, similar images, and many things right on your phone. While Google has the best reverse image search algorithm, there are other services too which do the job sufficiently well. I have tried to cover the alternatives as well as another dimension of image search too. You can check them out. If you liked the article and have some neat hack to share, let us know in the comment section below.
from Beebom https://beebom.com/reverse-image-search-phone/

No comments:
Post a Comment